How to Check Tire Pressure: Step-by-Step Guide
Last updated: August 16, 2026 · Reading time: 9 min
To check tire pressure correctly: remove the valve cap, press your gauge firmly onto the valve stem, and read the PSI. Compare against your door jamb sticker — not the tire sidewall. Inflate or release air to match. The whole process takes under 5 minutes and prevents blowouts, uneven tire wear, and the up-to-3% fuel-economy hit caused by under-inflation.
Checking tire pressure is one of the highest-impact maintenance tasks you can do for your vehicle. Correct tire pressure improves fuel economy, extends tire life, and — most importantly — reduces the risk of a blowout at highway speeds. This guide covers everything: when to check, how to find the right PSI for your specific vehicle, the three types of gauges, the step-by-step process, what to do if pressure is too high or too low, and why pressure changes even when you have no leak.
Quick Summary
- Check when tires are cold — parked for at least 3 hours
- Find your recommended PSI on the driver-side door jamb sticker
- Remove valve cap, press gauge firmly onto valve stem, read PSI
- Add air if low, press the valve pin to release air if too high
- Check all four tires and the spare every month
Why Tire Pressure Changes (Without a Flat)
Most drivers assume that if a tire isn't visibly flat, it holds pressure. This is wrong. Tire pressure changes constantly due to two unavoidable factors:
Temperature
For every 10°F (5.6°C) drop in temperature, tire pressure drops approximately 1 PSI. This means a tire correctly inflated at 35 PSI on a 70°F fall day could read just 28 PSI on a 0°F winter morning — well into dangerous territory. The reverse is also true: tires inflated on a cold morning may become over-inflated after a long summer drive.
Natural permeation
Air molecules slowly pass through rubber over time. Even a perfectly sealed tire loses 1–3 PSI per month through normal permeation. This is why monthly checks matter even for new tires.
Slow leaks
A nail, screw, damaged valve stem, or corroded wheel bead can cause a slow leak that loses 2–5 PSI per week — noticeable only with a gauge. If one tire consistently reads low, have it inspected.
When to Check Tire Pressure
Check at least once a month — the universal recommendation from tire makers like Michelin and Goodyear. Also check before long trips, after major temperature swings, and after hitting a pothole. And always check on cold tires: parked at least 3 hours, ideally first thing in the morning.
Read the full guide: How Often to Check Tire Pressure →
Step 1: Find Your Recommended PSI
The number molded into your tire sidewall is not your target pressure — it is the tire's maximum structural pressure limit. Never inflate to that number.
Your vehicle's recommended PSI comes from the manufacturer, not the tire brand. Find it here:
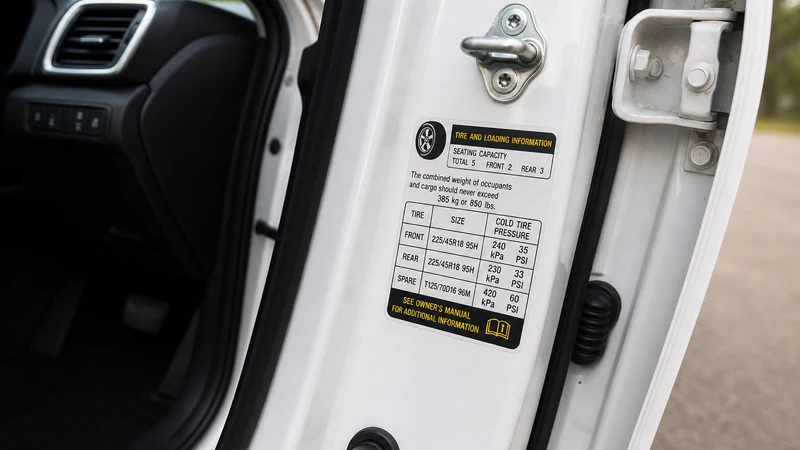
- Driver-side door jamb sticker (most reliable) — open the driver's door and look at the door frame. A label shows the cold tire PSI for front and rear, and sometimes separate values for different load conditions.
- Owner's manual — look in the "Tires" or "Specifications" chapter.
- Our vehicle database — see tire pressure by vehicle.
Typical ranges: Passenger cars: 30–35 PSI · SUVs and crossovers: 33–40 PSI · Trucks: 35–44 PSI · Electric vehicles (Tesla, etc.): 40–45 PSI · Compact spare ("donut"): typically 60 PSI
When Front and Rear Pressures Differ
Don't assume all four tires take the same number. Many vehicles specify different cold PSI for the front and rear axles — common on rear-wheel-drive cars, EVs, and trucks. A BMW X5 xDrive40i calls for 33 PSI front and 41 PSI rear; a Jeep Wagoneer S runs 39 front and 42 rear; heavy-duty pickups often specify much higher rear pressures for payload.
Your door jamb sticker prints both values — write down each axle's number before you start, and check against the correct one. Some stickers also list a separate full-load value for towing or hauling. Our vehicle database shows front and rear PSI separately for every model that differs.
Step 2: Choose Your Gauge
There are three types of tire pressure gauges. All work fine — pick the one that suits you:
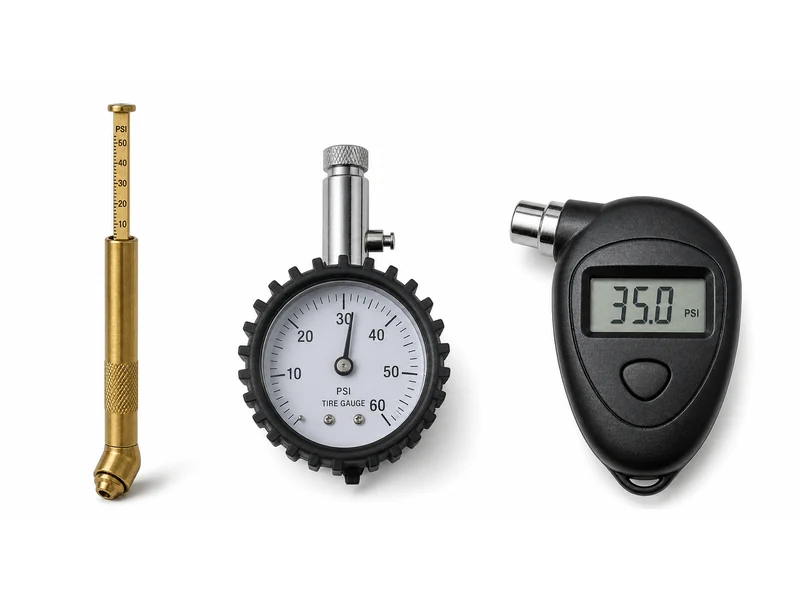
Pencil (stick) gauge — $3–$8
The classic. A small sliding bar pops out and shows PSI on a printed scale. No batteries, compact enough to keep in the glove box. Downside: the markings are small and can be hard to read, and cheap versions lose accuracy over time.
Best for: minimalists, emergency kit backup
Dial (analog) gauge — $10–$25
A round dial face, like a clock. Easier to read than the pencil type. Some models have a flexible hose that makes it easier to reach valve stems on inner wheels. Accurate and durable with no battery needed.
Best for: home garage use, daily drivers
Digital gauge — $10–$20
Shows an exact number on an LCD screen. Easiest to read, especially in low light. Accurate to within ±0.5 PSI. Requires a small battery (usually included). Some models include a built-in LED flashlight.
Best for: most people — accurate and easy to read
Avoid gas station gauges for accurate readings. They are handled roughly, rarely calibrated, and can be off by 4–5 PSI. Use your own gauge to verify, then use the station's air pump to inflate.
Gauge vs Dashboard TPMS: Which Number to Trust
If your car shows individual tire pressures on the dashboard, that's a direct TPMS — accurate to within about 1 PSI, but with caveats. Many systems refresh their readings more actively while the wheels are moving, so a parked car's display can show stale numbers. Sensors also age: batteries typically last 5–7 years, and aging sensors drift. If your car has indirect TPMS (no per-tire numbers, just a warning light), it measures nothing directly at all — it infers pressure loss from wheel speed.
The rule: trust a cold reading from your own gauge. If the dashboard and your gauge disagree by more than 2–3 PSI after a cold check and a short drive, suspect a drifting sensor. And always compare cold to cold — a warm dashboard reading against a cold gauge reading will mismatch even when both are "right."
Step 3: Check Each Tire
Remove the valve stem cap
The valve stem is a short rubber or metal tube poking out from the inner edge of the wheel. Unscrew the cap counterclockwise and put it in your pocket. Don't set it on the ground — it disappears instantly.
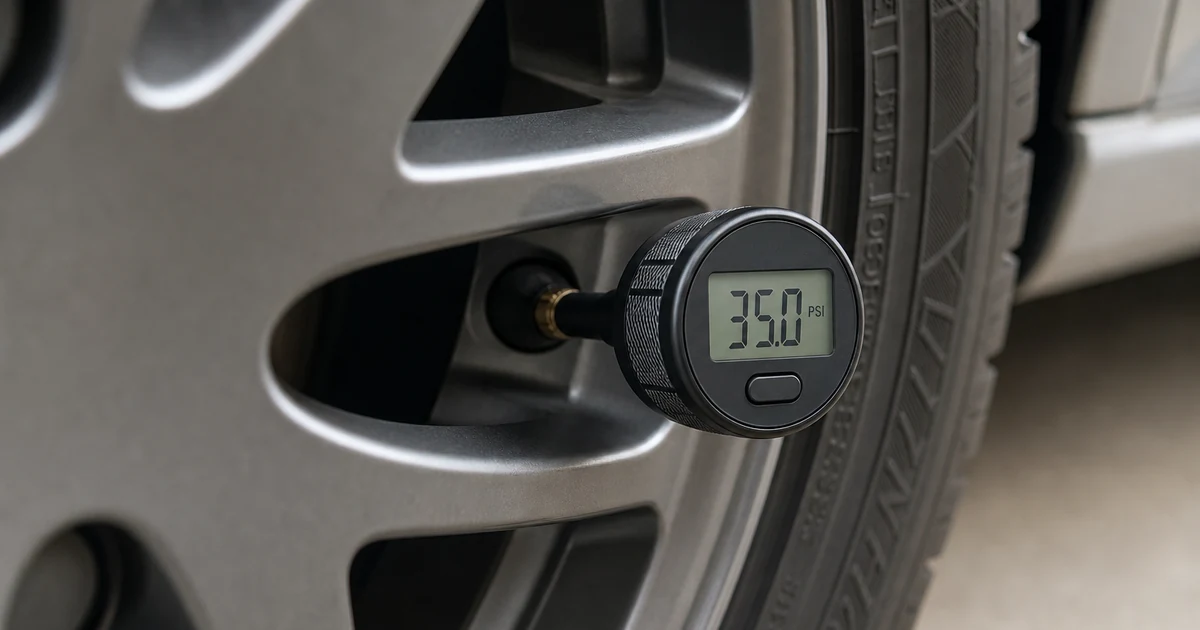
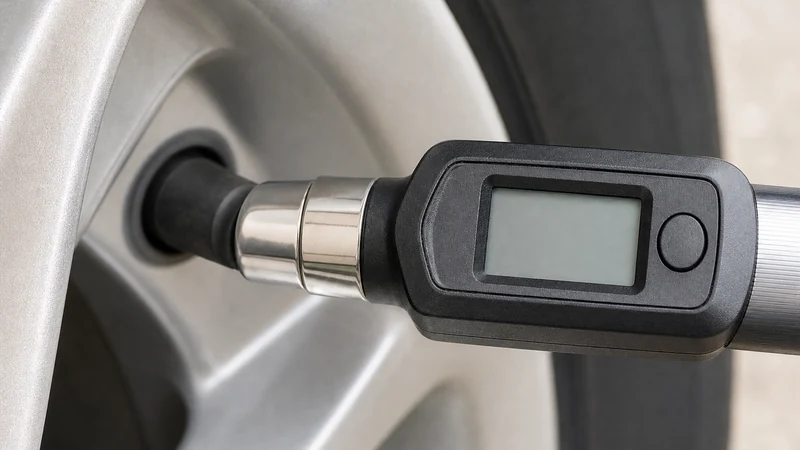
Press the gauge firmly onto the valve stem
Push the gauge straight onto the valve stem. Apply firm, even pressure. A brief hiss means the seal isn't perfect — reposition and try again. You should hear no air escaping when seated correctly.
Read the pressure
The gauge shows your current PSI. Write it down or remember it. Compare against your door jamb recommendation. If you check all four tires and one reads consistently 5+ PSI lower than the others, suspect a slow leak.
Add air if below recommended PSI
Attach an air pump hose to the valve stem. Inflate in short 3–5 second bursts and re-check with the gauge between each burst. Stop when you reach the target PSI. Most gas station air pumps charge $1–$2 and have a built-in gauge — use yours to verify.
Release air if above recommended PSI
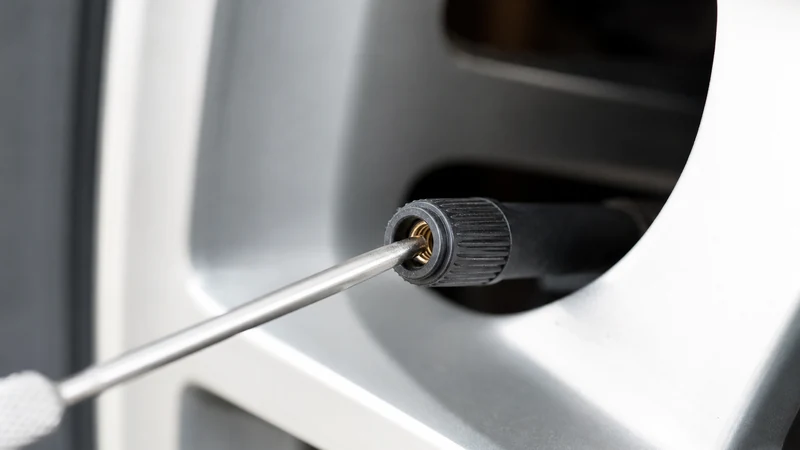
There is a small pin in the center of the valve stem. Press it with the tip of the gauge, a pen cap, or a small screwdriver. Air releases immediately — do it in short taps and re-check frequently. It's easy to release too much.
Replace the valve cap
Screw the cap back on. Caps keep dirt, moisture, and road debris out of the valve core. A missing cap leads to valve contamination and slow leaks over time.
If You Must Check When Tires Are Hot
Driving heats tires and inflates the reading: expect about 4 PSI above the cold spec after normal driving, and up to 6 PSI after sustained highway speeds. That rise is normal — it's heat, not extra air you need to remove.
Never bleed a hot tire down to the cold specification — once it cools, it will be genuinely under-inflated. This is one of the most common tire-pressure mistakes. If a hot tire reads below (cold spec + 4 PSI), add air up to that level, then recheck the next morning on cold tires and fine-tune to the exact sticker value. This +4 PSI workaround is also Bridgestone's official guidance.
Best practice: check first thing in the morning before driving. Hot-tire math is a workaround, not the standard — cold readings are the only ones your door jamb sticker refers to.
How to Check Tire Pressure at a Gas Station
Gas station air pumps are the most accessible way to check and inflate tires. Know your target PSI before you go, bring your own gauge (station gauges can be off by 4-5 PSI), and use short inflation bursts. Modern digital pumps let you set a target PSI and auto-stop — convenient, but still verify with your own gauge.
Read the full guide: How to Check Tire Pressure at a Gas Station →
How to Check Tire Pressure Without a Gauge
No gauge? No problem — at least temporarily. You can use visual inspection, the thumb press test, the thump test, and driving symptoms to roughly assess whether a tire is dangerously low. These methods are screening tools, not precise measurements: they can flag a tire that needs air, but they cannot tell you the exact PSI. Always follow up with a real gauge as soon as possible.
Read the full guide: How to Check Tire Pressure Without a Gauge →
What Happens When Pressure Is Wrong
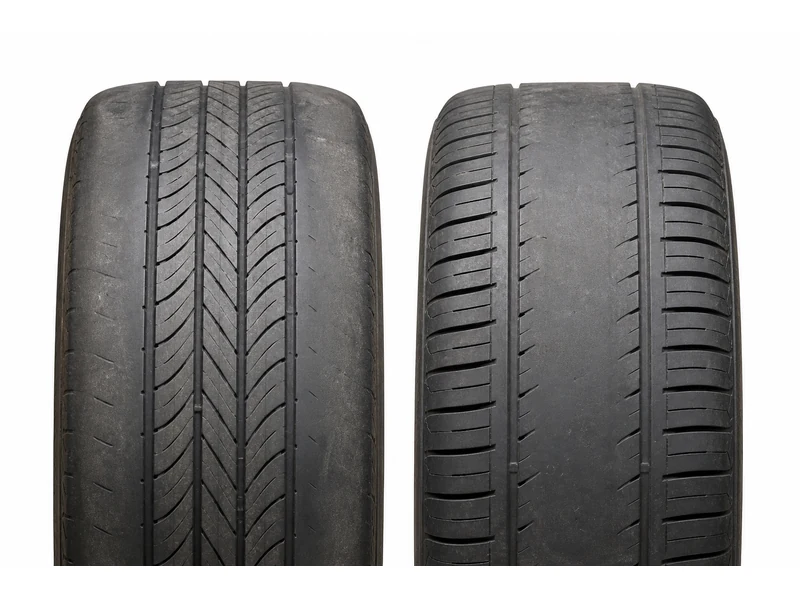
Too low (under-inflated)
- Fuel economy drops up to 3%
- Tires wear faster on outer edges
- Excess heat builds up — blowout risk increases
- Longer braking distance
- Sluggish, imprecise steering
Too high (over-inflated)
- Tires wear faster in the center of the tread
- Reduced traction — less rubber contacts the road
- Harsher, bumpier ride
- More vulnerable to pothole damage
- Increased risk of sudden blowout from impact
Don't Forget the Spare
Compact "donut" spares typically require 60 PSI — much higher than regular tires. Full-size spares use the same PSI as your regular tires. Check your spare monthly; a flat spare when you need it most is useless. If your spare is stored under the vehicle, it may be hard to reach — use sidewall firmness as a rough check, then inflate properly when you can.
Where to Check Tire Pressure for Free
You don't need to buy anything to check your tire pressure today:
- ✓Discount Tire / America's Tire — free tire pressure check and inflation, no appointment needed
- ✓Walmart Auto Care Center — free tire pressure and visual inspection
- ✓Gas stations — air pumps cost $1–$2 but use your own gauge to verify; station gauges are often inaccurate
- ✓Jiffy Lube, Firestone, Pep Boys — most offer free pressure checks as a walk-in service
A quality digital gauge costs $10–$15 and pays for itself quickly in better fuel economy. Worth owning one.
Frequently Asked Questions
How often should I check tire pressure?
At least once a month and before any long trip. Also check after any significant temperature drop — for every 10°F drop in temperature, tire pressure falls about 1 PSI. The first cold week of fall is when most drivers' TPMS lights activate.
Why does my tire pressure keep dropping without a leak?
Tires naturally lose 1–3 PSI per month through normal permeation — air molecules slowly pass through the rubber. Temperature drops also reduce pressure significantly. If one tire drops faster than the others, have it inspected for a slow leak from a nail, damaged valve, or corroded bead.
Can I drive with low tire pressure?
Not advisable. If your TPMS light is on, your tires are already 25% below recommended pressure — seriously low. Inflate as soon as possible. Driving on a severely flat tire for even a short distance can permanently damage the tire and wheel, turning a $15 repair (nail removal) into a $200+ tire replacement.
What happens if I over-inflate my tires?
Over-inflated tires wear faster in the center, reduce traction because less tread contacts the road, make the ride harsher, and are more vulnerable to blowouts from impact. More air is not better — stay within 2 PSI of the manufacturer's recommendation.
Where can I check tire pressure for free?
Discount Tire, America's Tire, and most independent tire shops will check and inflate your tires for free. Walmart Auto Care Centers also offer free checks. Gas station pumps cost $1–$2 — bring your own gauge to verify the reading.
Is nitrogen better than regular air for tires?
Nitrogen molecules are larger than oxygen and leak through rubber more slowly, so pressure stays stable slightly longer. However, the real-world difference is small for most drivers. You can always top off nitrogen-filled tires with regular air — it won't cause harm. The main benefit of nitrogen is for track use and aircraft, where consistent pressure is critical.
Can I check tire pressure when the tires are hot?
Yes, but interpret the reading differently. Driving raises pressure about 4 PSI — up to 6 PSI at sustained highway speeds. Never bleed a hot tire down to the cold specification, because it will be under-inflated once it cools. If a hot tire reads below the cold spec plus 4 PSI, add air to that level, then recheck when cold and fine-tune to the exact sticker value.
Sources
- Bridgestone — How to Check Tire Pressure (cold-tire definition; the +4 PSI rule for adjusting hot tires)
- Michelin — Tire Pressure Maintenance (monthly check recommendation; normal pressure loss over time)
- Your vehicle's owner's manual and driver-side door jamb sticker — the authoritative source for the exact PSI of your specific trim and tire size.