
How to Change a Flat Tire: Step-by-Step Guide
Last updated: July 22, 2026 · Reading time: 10 min
To change a flat tire: pull off the road, turn on hazard lights, and set the parking brake. Loosen the lug nuts a quarter turn before jacking. Raise the car, remove the flat, mount the spare, hand-tighten the nuts, lower the car, then torque the lugs to spec. The whole job takes 30–45 minutes for a first-timer.
A flat tire is one of the most common roadside problems — and one of the most fixable. Every car with a spare (and most cars without one) can get back on the road in under an hour with basic tools. This guide walks through the entire job: the safety checks that come first, the 10 mechanical steps, what each type of spare tire does differently, how much it costs if you decide not to do it yourself, and what to do after the swap so the spare lasts and you stay safe.
Quick Summary
- Pull off the road, hazard lights on, parking brake set
- Loosen lug nuts a quarter turn — before jacking
- Jack the car at the manufacturer's lift point
- Remove the flat, mount the spare
- Hand-tighten nuts in a star pattern, lower the car
- Torque to 100 ft-lb in a star pattern — drive cautiously
What to Do When You Get a Flat Tire
The mechanical job takes 30 minutes. The decisions you make in the first 60 seconds determine whether you do it safely. Most roadside injuries during tire changes come from drivers who tried to change a tire in an unsafe location, on unstable ground, or near passing traffic.
Pull completely off the road
A flat tire on a highway shoulder is dangerous only if you are in the lane of travel. Drive slowly — 25 mph or less — to the nearest exit, straight stretch, or wide shoulder. You need at least 2 feet of clearance from passing traffic to work safely. If you cannot find that, stay in the car with seatbelt on and call roadside assistance.
Hazard lights on, parking brake set
Turn on your hazard lights (four-way flashers) the moment you sense trouble — even before you pull over. Set the parking brake firmly once stopped. This prevents the car from rolling while it is jacked up, which is the single most dangerous failure mode during a tire change.
Check the ground
The jack needs firm, level ground. Soft asphalt on a hot day, gravel, mud, or a sloped shoulder can cause the jack to sink or tip. If the surface is questionable, place a flat board, a piece of plywood, or even a flat rock under the jack base. Never jack on a hill — move the car to level ground first.
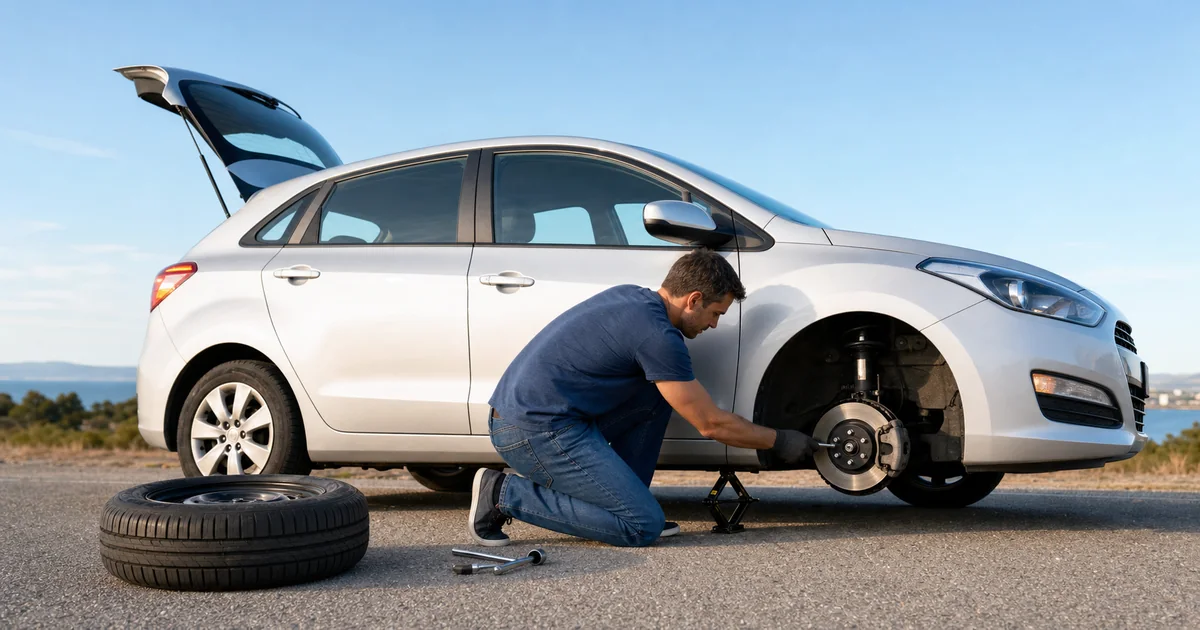
Step-by-Step: How to Change a Flat Tire
The full job, in order. Read all 10 steps once before touching a tool — many of the mistakes come from doing steps in the wrong sequence (especially: loosening lug nuts before jacking).
Find a safe, level spot and stop
Pull off the road onto level, firm ground. Turn on hazard lights, set the parking brake, and turn off the engine. Put the transmission in Park (automatic) or Reverse (manual). If you have passengers, have them exit the vehicle and stand away from traffic.
Get the spare and tools
The spare, jack, and lug wrench are usually stored under the trunk floor or behind a side panel in the cargo area. For SUVs and crossovers, the spare may be mounted under the rear of the vehicle — lower it with the winch mechanism (usually a crank handle in the cargo area). Confirm you have a tire that is inflated before you start the job.
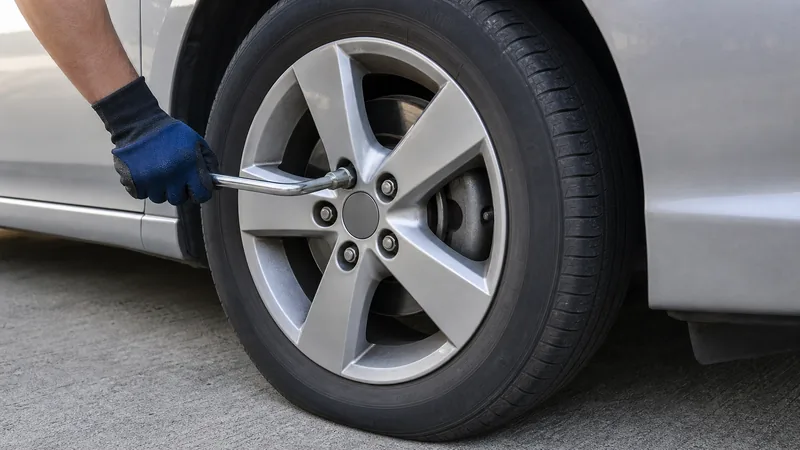
Loosen the lug nuts a quarter turn — DO NOT REMOVE THEM
Use the lug wrench to break each lug nut loose while the tire is still on the ground. Turn counter-clockwise. They will be tight — 100 ft-lb from the factory — so use your body weight or step on the wrench handle. Loosen all five (or four) lugs about a quarter turn each. Do not remove them yet.
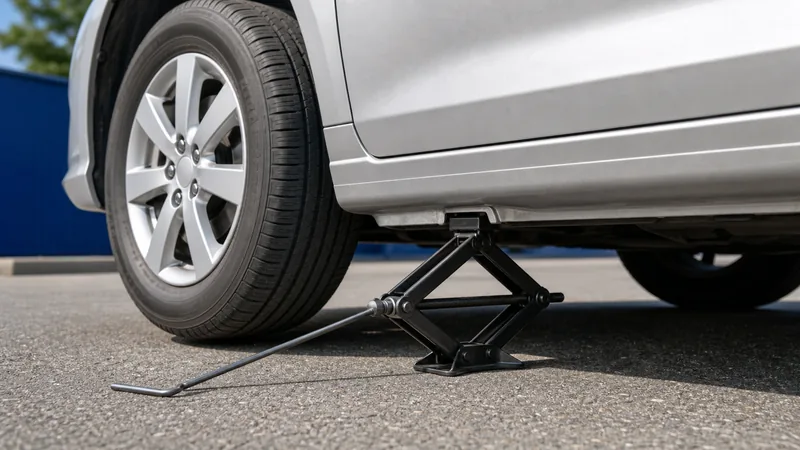
Place the jack at the manufacturer's lift point
Every car has reinforced jack points — usually a notch behind the front wheel or in front of the rear wheel, just behind the rocker panel. Your owner's manual shows the exact location. The jack head should seat fully into the pinch weld notch. Never jack under the oil pan, floor pan, or bumper.
Raise the car until the flat tire is off the ground
Crank the jack handle until the tire is about 2 inches off the ground. The car should be high enough that you can slide the spare on without scraping. Do not raise it higher than necessary — the higher the car, the less stable the jack.
Remove the lug nuts and the flat tire
Now fully remove the loosened lug nuts and set them somewhere safe (a hubcap or your pocket works). Grip the flat tire with both hands and pull it straight off the wheel hub. It is heavy — about 25–30 lbs. Lay it flat on the ground beside the car.
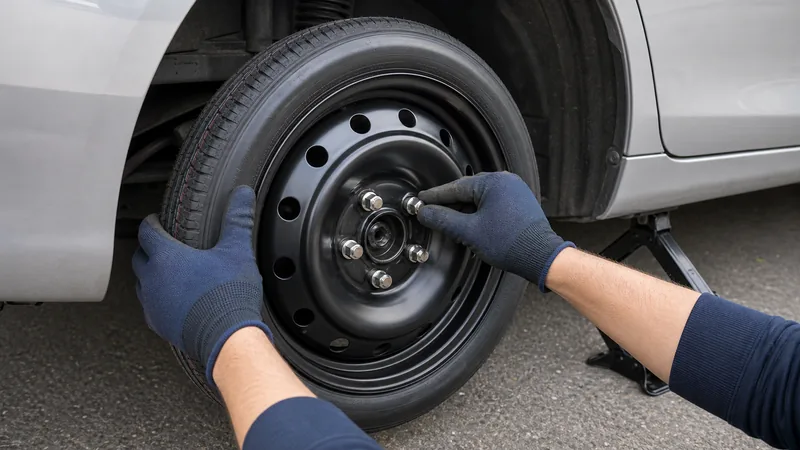
Mount the spare
Lift the spare onto the hub, aligning the holes with the wheel studs. Push it on as far as it will go by hand. If it does not slide on, the spare may be backward — most temporary spares are directional and must mount with the 'outside' label facing out.
Hand-tighten the lug nuts in a star pattern (while the car is still jacked up)
Push each lug nut onto a stud and finger-tighten them. Then use the wrench to snug them down — still in a star (alternating) pattern, not in a circle. The car is still on the jack, so the wheel can spin if you push too hard — keep it snug, not tight. Final torque happens after the car is back on the ground.
Lower the car so the tire just touches the ground
Turn the jack handle to lower the car slowly until the tire just contacts the ground — the jack should still be supporting most of the weight. The wheel is now stable and won't spin, which is essential for accurate torque readings.
Torque the lug nuts in three passes (star pattern)
Use a torque wrench — most passenger cars take 100 ft-lb, but check your owner's manual (some trucks and SUVs take 110–120 ft-lb). Tighten in a star pattern, going around three times: first pass to ~33 ft-lb, second pass to ~66 ft-lb, final pass to the full 100 ft-lb. This three-pass sequence prevents warped brake rotors and loose wheels.
Spare Tire Types and What They Mean
Not all spare tires are the same. Knowing what you have changes how you drive on it and how far you can go.
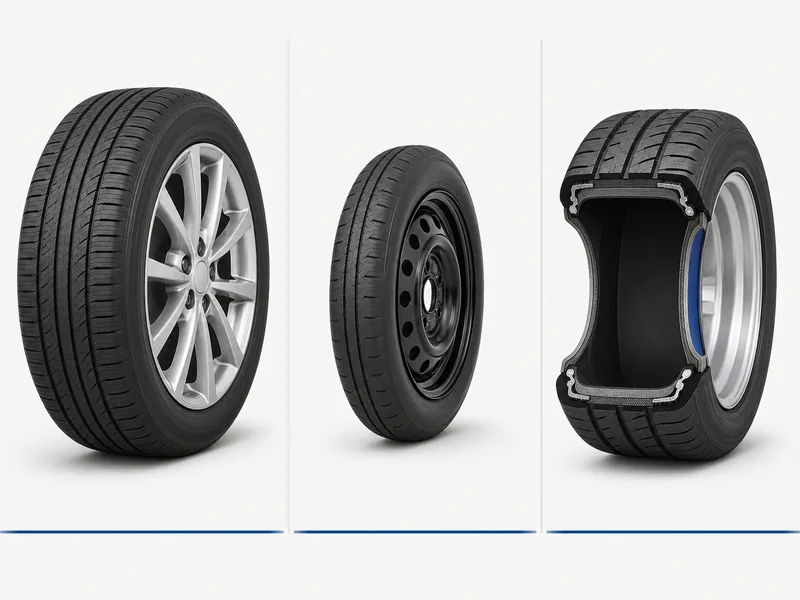
Full-size spare — match to your other tires
The same size and type as your four driving tires. You can drive at normal speed, for normal distances, and the spare can be rotated into regular service later. Most modern SUVs and trucks include a full-size spare (sometimes mounted under the bed or rear).
Best for: long drives, normal speeds, full-size spare owners
Compact temporary spare ("donut") — limited use only
Smaller, lighter, inflates to 60 PSI, and clearly labeled "Temporary Use Only" or "T125/80R16" or similar. Speed limit: usually 50 mph (80 km/h). Distance limit: usually 50 miles (80 km). Driving faster or farther can cause the spare to fail catastrophically.
Best for: getting to a tire shop, not for normal driving
Run-flat tires — no spare at all
Many newer cars (BMW, Mini, some Tesla trims, some Mercedes) come with run-flat tires and no spare. Run-flats have reinforced sidewalls that support the car at low speed for about 50 miles after a puncture. You drive carefully to a tire shop — do not exceed 50 mph and replace the tire within the same week.
Best for: avoiding roadside work, accepting higher tire replacement cost
Cost: DIY vs Mechanic vs Roadside Assistance
Doing it yourself is free (you already own the tools if your car has a spare). The decision is whether to replace the tire — and that cost varies a lot by option.
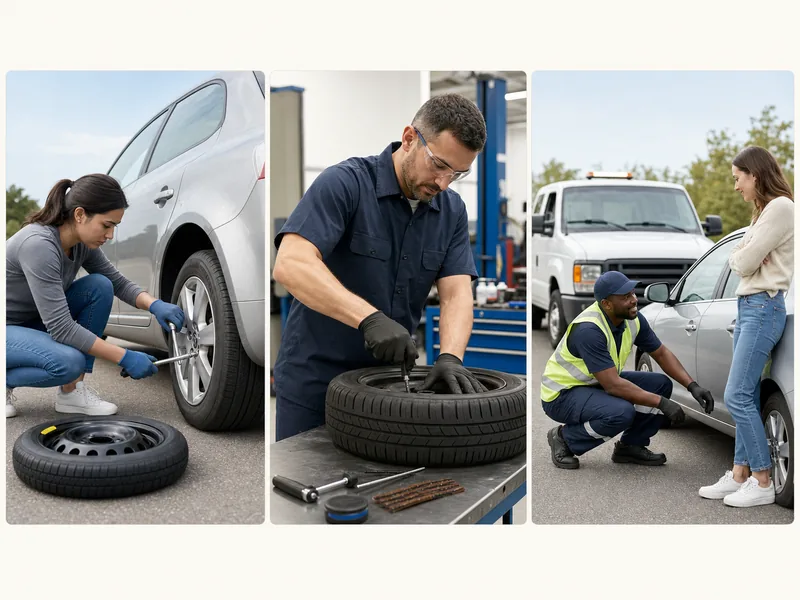
DIY (your spare)
$0 for the swap itself
Plus the cost of replacing the flat tire later ($100–$400). Already have the tools.
Tire shop repair
$20–$50 for a plug-and-patch
If the puncture is in the tread and the tire is otherwise sound. Quick — about 30 minutes.
Roadside assistance
Free with AAA / insurance add-on
Membership: $60–$130/year. Service does the swap for you. Wait time: 30–60 minutes typical.
If the tire is unrepairable (sidewall damage, large puncture, age-related failure), full replacement is $100–$400 per tire. Most cars use the same tire on all four positions — replace all four if the failed tire is significantly more worn than the others. Check how to check tire pressure to evaluate the remaining tires.
After You Changed It: Re-torque, Drive Slowly, Replace Soon
Three things to do in the first 50 miles after a tire change — they are easy to forget and matter more than people realize.
Re-torque the lug nuts after 50 miles
Lug nuts can settle and loosen slightly after the first few miles of driving. Stop at 50 miles, set the parking brake, and re-torque each lug nut to spec using a star pattern. This step is critical on a temporary spare — a loose lug at 50 mph can destroy the wheel and cause a crash.
Drive slowly and avoid highways
If you mounted a temporary spare, stay under 50 mph and avoid highways. The compact spare is not designed for sustained high-speed driving — it generates more heat and can fail without warning. Take surface streets to a tire shop.
Check the spare pressure and replace the flat
Temporary spares often sit unused for years and lose pressure slowly. Confirm the spare is at 60 PSI (or whatever is printed on the sidewall) before relying on it. Drive the flat tire to a shop within a day or two and either repair it ($20–$50) or replace it ($100–$400).
Don't Forget the Flat Tire in Your Trunk
Many drivers finish the swap, drive home, and leave the flat in the trunk for months. Schedule the repair or replacement now — a flat tire that rolls around loose in the cargo area is a hazard in a sudden stop and will slowly destroy itself as it sits uninflated.
Frequently Asked Questions
How much does it cost to fix a flat tire?
A simple puncture repair (patch + plug) at a tire shop costs $20–$40. A full tire replacement runs $100–$400 per tire depending on brand and size. Roadside assistance membership (AAA, etc.) typically covers labor at no extra cost beyond the annual fee.
How much does it cost to change a flat tire at a shop?
If you bring a flat to a shop, expect $25–$50 for the labor of removing the wheel and dismounting/mounting the tire. The cost of the new tire itself is separate. Most tire shops (Discount Tire, America's Tire, Walmart Auto) will swap a flat for your spare at no charge if you bought the tires there.
Can I drive on a flat tire?
No. Driving even a short distance on a fully flat tire destroys the tire sidewall (a non-repairable failure) and damages the wheel rim — turning a $30 repair into a $200+ replacement. If the tire is completely flat, change it or call roadside assistance before moving the car.
How long does it take to change a flat tire?
For a first-timer following the steps: 30–45 minutes. With practice: 15–20 minutes. The longest step is loosening the lug nuts — they are often torqued to 100 ft-lb from the factory and may require standing on the lug wrench. Tire shops can do the same job in 10–15 minutes.
Is it safe to change a flat tire on the highway shoulder?
Only if you can pull fully off the roadway onto a flat, stable surface at least 2 feet from traffic. Turn on hazard lights, set the parking brake, and stay aware of passing vehicles. If the shoulder is too narrow, the road is curved with poor sight lines, or traffic is moving at highway speed, exit the highway first or call roadside assistance — it is not worth the risk.
What's the difference between a flat tire and a punctured tire?
They mean the same thing in everyday speech. 'Flat' describes the symptom (no air, cannot drive); 'punctured' describes the cause (a nail, screw, or sharp object made a hole). A tire can also go flat from a damaged valve stem, a failed bead seal against the rim, or a sidewall blowout — none of which involve a puncture. Always inspect the flat tire before assuming a simple repair is possible.